|
A good filtration system for your turtle pond is a must, so you can enjoy actually seeing them in clear water, but also for the sake of their health. Turtles are very dirty, and the more turtles, the more mess, and therefore the more filtration required. Of course there are many ways to achieve effective filtration, and the main thing is that they work.
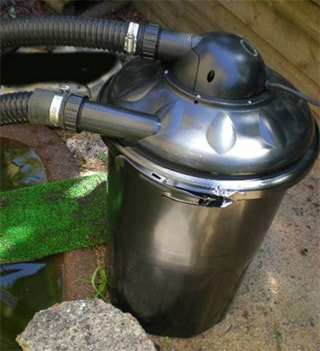
I have researched pond filtration and have found that for a small turtle pond say about up to about 2,000 litres, it is more cost effective to buy a commercially available filter. The Jebao PF30 (pictured above) is a biological and mechanical filter with 11 watts of Ultra Violet Clarification (UVC) as well, and is about $200 on ebay. However, for a larger turtle pond, you will probably find it cheaper to make your own as per my design below, even if you add on a separate UVC.
A note on UVC: Ultra Violet Clarification will help keep your pond from going green (eg if it is exposed to a lot of sunlight). The UV lamp does not prevent algae forming. It works by killing the algae faster than they can make the water go green. The algae will still tend to form so long as the conditions suit them. However if the wattage of the UV Clarifier is too low then the water will remain green for the reason that the algae are forming more quickly than they can be killed. If in any doubt when choosing an UV Clarifier go for a larger size. You cannot overdose with UV! |
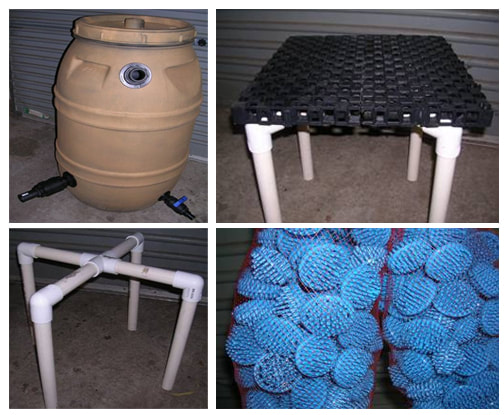
The simple design of this pond filter (pictured above) was put together after researching various other designs on the internet and in person. I have now made three of these. It may not be sophisticated and it certainly didn't cost as much to make as a commercially available one, but it works well, and you are welcome to copy it. You are also welcome to suggest improvements to it.
A 44 gallon (220 litre) plastic drum has been used. Be sure not to get one that has held chemicals. This one held olives and cost $25 on ebay. Formerly grey, I've sprayed it beige to blend it in with a bamboo screen. An old wheelie bin would work just as well.
The fitting on the bottom (left side), located about 20cm from the ground is the inlet (from the pump) and has a backflow prevention valve fitted. This takes a 40mm flexible hose. Note I have found the backflow prevention valve prone to blocking up and therefore not effective. The fitting on the bottom (right side), located about 15cm from the ground is a tap to drain the filter and takes a 25cm flexible hose. The fitting at the top is the outlet (back to the pond), in this case for a 50mm flexible hose. Some holes are drilled into the lid. Fittings are available from Dural Irrigation. Flexible hose is available from Rock Around the Block.
Second picture above: Inside the drum is a 30cm high stand made from PVC pipe.
Third picture above: On top of that is some egg crate type plastic cell.
Fourth picture above: Stacked on top of that is a large quantity of bio balls packed into bags similar to what they use to package oranges. Bio balls are available from Kenthurst Fish and Filters.
Not shown: Above the bio balls (below the outlet) is a matting type material (like a big scouring pad) that will collect any further solid waste.
Mechanical and biological filtration removes visible and invisible toxic waste. Bacteria in the filter live off the wastes, so the more filtration the better, especially for turtles as they are very dirty. Also note with your plumbing, the larger the diameter of your pipes, the greater the flow of the water will be.
The total cost of this filter was about $300. A variation of this filter would be to have the inlet at the top with an internal pipe taking the water down to the bottom. The outlet would also be at the top, below the inlet. An example of this is at http://www.runnerduck.com/pf1.htm. A second barrel filter with mechanical filtration using scoria could easily be added on in series to the first filter if need be.
|
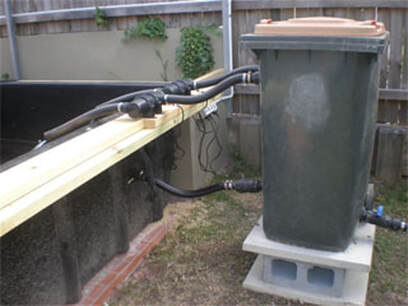
Right: July 2009. Here is the latest variation on the above theme. Internally there is no change from the 3 pictures above. However I am now using a wheelie bin I bought on ebay instead of a drum. There are two reasons for the change. Firstly with the flat sides it is easier to get a nice watertight fit with the tank outlets, and secondly there is more capacity, with 240 litres.
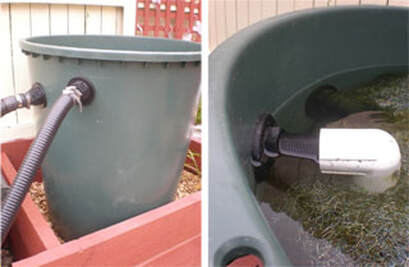
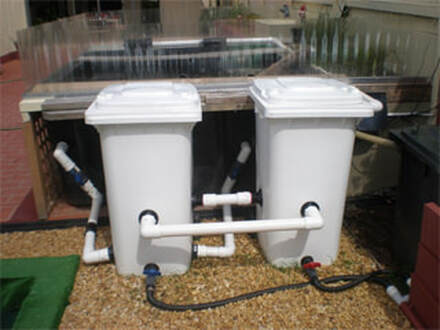
Water is pumped through a submersible pump through fittings on the side of the pond into the bottom of the bin (via a backflow prevention valve). The water exits through twin outlets at the top, goes through the UVC's and back to the pond. The filter has been raised off the ground so gravity can assist the water to return back. The outlet on the lower right hand side is to allow the filter to be easily emptied for cleaning. Right: December 2009. The wheelie bin filter unfortunately was not successful due to a small crack that developed in the base that of course caused a leak. I replaced the wheelie bin with the 310 litre rain water tank ($99 from Bunnings) pictured above, which is designed to hold water. So far it is working well. The inlet pipe is the higher one in the foreground with the white PVC elbow that takes the water to near the bottom of the tank. The outlet is the lower hose. There is no backflow prevention valve fitted, however there is a small hole drilled into the white PVC elbow. This prevents the siphoning effect in case of power failure, where the water would otherwise drain back to the pond. There is a tap (not shown) at the bottom of the tank.
|
This is a simple and cost effective filtration system that anyone can do.
Update: Everything was fine with this system until the pump starting cutting out and wouldn't start again unless I gave the impeller a push with a screwdriver to get it going. The last time it did this I removed the pump and sent it for repair. In the meantime I put a Titan 5500 pump in it's place, but was surprised when this smaller pump was pumping much quicker than the 8000 lph pump.
This made sense when I was advised that the pump stator on the 8000 had partially fused in one of the fields giving it only about 1/3rd power/performance (this is non repairable). However with my spare 5500 lph pump, the water couldn't get away quick enough from the filter, so I had to install 2 extra 40mm outlets, and only one of the 3 went through the UVC. This was not a satisfactory solution to the problem, so basically I started again from scratch, see below.
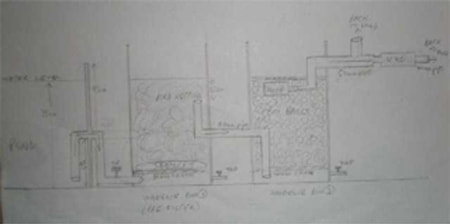
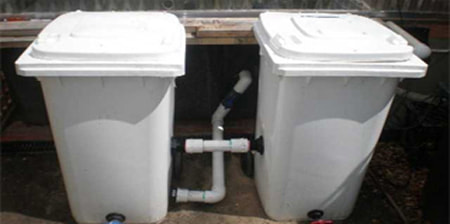
Above: February 2010. After much helpful advice from two fellow turtle keepers, Nev and Arthur, I have basically started from scratch with a new gravity fed filtration system. The top pic is what I drew up to show the water flow, the second pic is how it looks now. You'll see the water exits the pond and goes through a tap into the bottom of the first wheelie bin which is a pre-filter containing bird netting. The water goes up inside that bin then down through a pipe to the bottom of the second filter. The water sits at the same level as the pond, approx 75cm. At the top of the second filter (above the bio balls and matting) is a pump that takes it over to the far side of the pond where it exits (not visible) firstly through the 50mm pipe then through a UVC. The pump lifts the water less than 30cm. So far this system is working well. After previous problems with a wheelie bin sitting on a cement slab that eventually leaked through the base of the bin, I have these ones sitting on a bed of sand.
Whilst I am happy to share information via this website, please note Turtle Town is not a shop, nor a tourist attraction, it is my backyard hobby, ie my home, and therefore not open to the public.
Please note, I am not qualified to give veterinarian advice. Before you phone me with any questions please read the FAQ page and the Turtle Care Info page, your questions will probably be answered there. This page is also recommended reading if you are considering keeping a turtle as a pet.
For inquiries contact Shane on 0404 463 446 (please don't text) or email info@turtletownsydney.com
